SOURCE: goodhousekeeping.com
Creating a personalized Easter basket is easier than you think ๐ฐ.
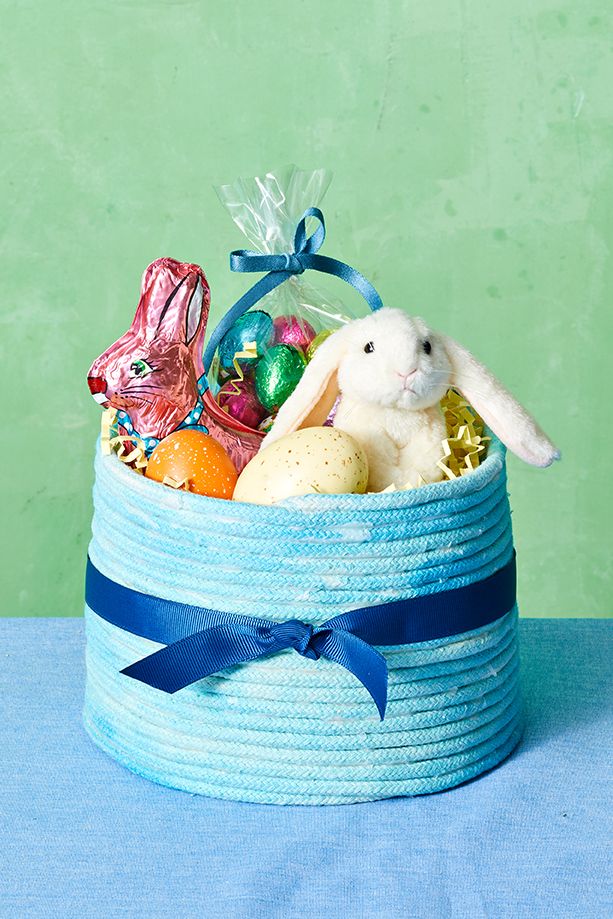
Follow this simple DIY guide for a unique and thoughtful Easter gift that anyone will love:
๐๐ฎ๐๐ต๐ฒ๐ฟ ๐๐ต๐ฒ ๐ฒ๐๐๐ฒ๐ป๐๐ถ๐ฎ๐น๐: ๐ฐ๐ผ๐๐๐ผ๐ป ๐ฟ๐ผ๐ฝ๐ฒ, ๐น๐ถ๐พ๐๐ถ๐ฑ ๐ณ๐ฎ๐ฏ๐ฟ๐ถ๐ฐ ๐ฑ๐๐ฒ, ๐ต๐ผ๐ ๐ด๐น๐๐ฒ ๐ฎ๐ป๐ฑ ๐ฎ ๐ฐ๐ฟ๐ฎ๐ณ๐ ๐ฝ๐ฎ๐ถ๐ป๐๐ฏ๐ฟ๐๐๐ต ๐๐ผ ๐๐๐ฌ ๐๐ต๐ถ๐ ๐๐ฒ๐ฟ๐ฒ๐ป๐ฒ ๐ฏ๐น๐๐ฒ-๐ฐ๐ผ๐น๐ผ๐ฟ๐ฒ๐ฑ ๐ฟ๐ผ๐ฝ๐ฒ ๐ฏ๐ฎ๐๐ธ๐ฒ๐. (๐๐ผ๐ป๐๐: ๐ฆ๐ฒ๐๐ถ๐ป๐ด ๐ถ๐๐ป’๐ ๐ฟ๐ฒ๐พ๐๐ถ๐ฟ๐ฒ๐ฑ!)

Steps:
- Spiral the rope into a circle and apply hot glue as you attach the rope together. Continue wrapping until you make the circle large enough to be the bottom of your basket.
- Start stacking the rope on top of itself to create the sides of the basket and use the same hot-glue technique to secure the rope.
- Continue step two and make sure to keep everything straight until you have your desired height.
- Trim the rope’s end and hot-glue the end inside the basket to prevent it from fraying or getting loose.
- Water down some of the fabric dye and brush it onto the sides until you achieve your desired tone of color. Once it’s dry, your basket is ready to use!
Spring is a time to be creative to make this year’s basket the best one.

